In this section, I will explain how to setup CPU preference for your KTX-PC.
It is a little different from the other KTX robots, please follow the steps below.
<!> Before start working steps below, please read through entire document on this page, to know more about what I'm doing here.
<!> By re-setting up the CPU preference from default setting, it will fix the problem caused by the change you made. It's really hard to debug the change that causing the problem. It's a lot easier to just initialize and reset the setting.
<!>
<!>
<!> Do NOT apply power to the servo, until you finish calibrating the servo motors. If you initialize the CPU board, it will lose all the calibrated positions. Therefore, you have to do calibration again before using your robot for development.
1. Reset CPU Board
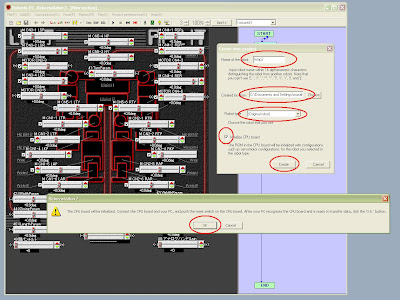
By initializing the CPU board for "Original Robot",
it will set all the CPU preference back to default.
It will initialize CPU board, and changes all the preference back to factory default.
Press "OK" if it asks...
We just need this project file for initializing CPU board, once it initializes, close the RM2 and delete the entire folder you just created.
<!> Do not Apply power!!!
2. Open Robot Project
Open your "existing" Robot Project, the one you are currently using...
As I said..., Robot Project does not contain (It contains, but not loaded by RM2) CPU preference. Therefore, the setting remains the same as the setting you just initialized as "original robot".
Connect CPU board.
It will ask for loading appropriate project, select "NO".
3. Change CPU Preference
Go to Project Preference -> CPU preference -> Preferences of CPU board.
Change following:
- Activation Timer: -1
- Serial Setting: CN7, Command
- CN1-5(04)
300 31 133 - CN1-6(05)
200 32 132 - CN2-5(10)
-300 31 133 - CN2-6(11)
200 32 132 - CN5-1(24)
256 41 244 - CN5-6(29)
-256 41 244 - CN5-3(26)
15000 49 246
5600 49 78 - CN5-4(27)
-15000 49 247
5600 49 79
Go to Expansion Board Preference and add Gyro/Accel Sensor board.
Click on "Apply". If your board is connected correctly, it will show you the sampling values.
Change "offset" and click "Apply", It will adjust the sampling value. Please adjust the sampling value close to Zero at standing straight position (You can set this at shitting down straight position, too. Make sure your upper body is straight up).
Once you finish it, click on"Apply" and apply changes you made.
You will see some dialog box, just click "OK".4. Upload the change to CPU Board
It might ask for the missing audio file, just click "OK". I will fix that later...
(Or you can fix this by yourself, go to each motion file that has audio files in and change the track number to zero.)
Once it finish loading, cklick "OK" and and close the transfer window.
5. Backup the CPU Preference
Go to your Project directory and look for the file, "medit_rom.ini". Copy and paste the file, and change the name to "medit_rom_backup.ini".
6. Loading Preference from Backup
Close RM2 if you have it opened.
Go to your Project directory, and delete your current "medit_rom.ini". Copy and paste "medit_rom_backup.ini" and change the name to "medit_rom.ini".
Then, Click on robot project file and start RM2.
Now, Click on transfer button without establishing connection, and write preference to the CPU board.
Trick is "Without Establish Connection"...
Once you have connection, RM2 automatically loads CPU preference from CPU board and updates "medit_rom.ini". By transfering your backup preference without establishing connection, you can prevent this automated updates of CPU preference.
7. Calibrate the robot
Please follow the steps for the calibration in this page.
Quick Fix!
You might notice this quick fix at step 6...
Yes, you don't have to follow above steps to fix your problem on CPU preference...
You can download the original "medit_rom.ini" file from here >> and use this file as your backup and do step 6 and 7.
Wow, easy...


No comments:
Post a Comment