>> Play Motion File
I added "Real Time Motion Control" sample in my example.
You can move the head yaw servo right and left by using your up and down keyboard keys.
Please download complete project here >>
Quick Review
In main.cpp, first it will call "Vsrc003" class constructor.
//Vsrc003 vsrc003("../Sample Motion/KTX/initMotion.txt");
Vsrc003 vsrc003("../Sample Motion/KTX-PC/initMotion.txt");
Vsrc003 vsrc003("../Sample Motion/KTX-PC/initMotion.txt");
If you are using KTX, use the init motion for KTX.
Inside constructor, it will call startup member function and do initial setup for VSRC003 as I demonstrated in previous tutorial.
In the startup member function of Vsrc003 class, it has a ServoPowerOff() call.
bool Vsrc003::Startup(char* fpath){
ServoPowerOff(); //not required...
ServoPowerOff(); //not required...
If you assume your servo is not powered up before running the software, then you don't need to power off the servo.
Or, if you want to have the robot powered prior to the excecution of your motion file, you need comment this line out, and add power on function call.
In the "initMotion.txt" file, I used step size of 10steps.
If you want to have smoother startup, you can increase the step size.
<!> If you add more steps in poses, it will take more time to finish the motion.
After loading and playing the init motion, it will load and play "RealTimeMotion.txt".
//vsrc003.LoadMotion("../Sample Motion/KTX/RealTimeMotionControl.txt");
vsrc003.LoadMotion("../Sample Motion/KTX-PC/RealTimeMotionControl.txt");
vsrc003.ServoPowerOn();
vsrc003.PlayMotion(-1); //-1 for infinit loop
Once it started, you should be able to move the servo motor by pressing up and down arrow keys.
cout << "\nPlease press ESC to stop playing motion";
do{
if(GetKeyState(VK_ESCAPE) & 0x80){
cout << "\nESC is recognized. Cancel playing motion.";
vsrc003.CancelMotion();
}else if(GetKeyState(VK_DOWN) & 0x80){
value--;
//update value
vsrc003.SetValue(variable, value);
}else if(GetKeyState(VK_UP) & 0x80){
value++;
//update value
vsrc003.SetValue(variable, value);
}else{
//ignore
}
}while(vsrc003.GetStatus() == PLAYING_MOTION);
<!>The Problem causing the shaking or the situation that the servo moves back to original position, was caused by the control device preference.
By default, the control device is preset to the remote controller. Even if the remote controller is turned off, it will overwrites the position of the servo, unless you take off the receiver from the robot.
What happening here is following:
1. SDK sends signal to overwrite a variable (analog stick variable #246).
2. Servo moves to the position specified.
3. Receiver sends (updates) signal to the memory space assigned for remote input, which also overwrites variable #246 with ZERO
4. Servo moves back to the original position (zero degree).
By setting controller type to "0" (not connected, used for VSRC003SDK) you can disable the remote input, which prevents remote receiver overwriting the value.
This applies to all the applications use SDK.
Please use VSRC003_SetValue(240,0) to set the controller preference to SDK.
Also, I updated the example 04/27/2011, please check it also.
Motion Files
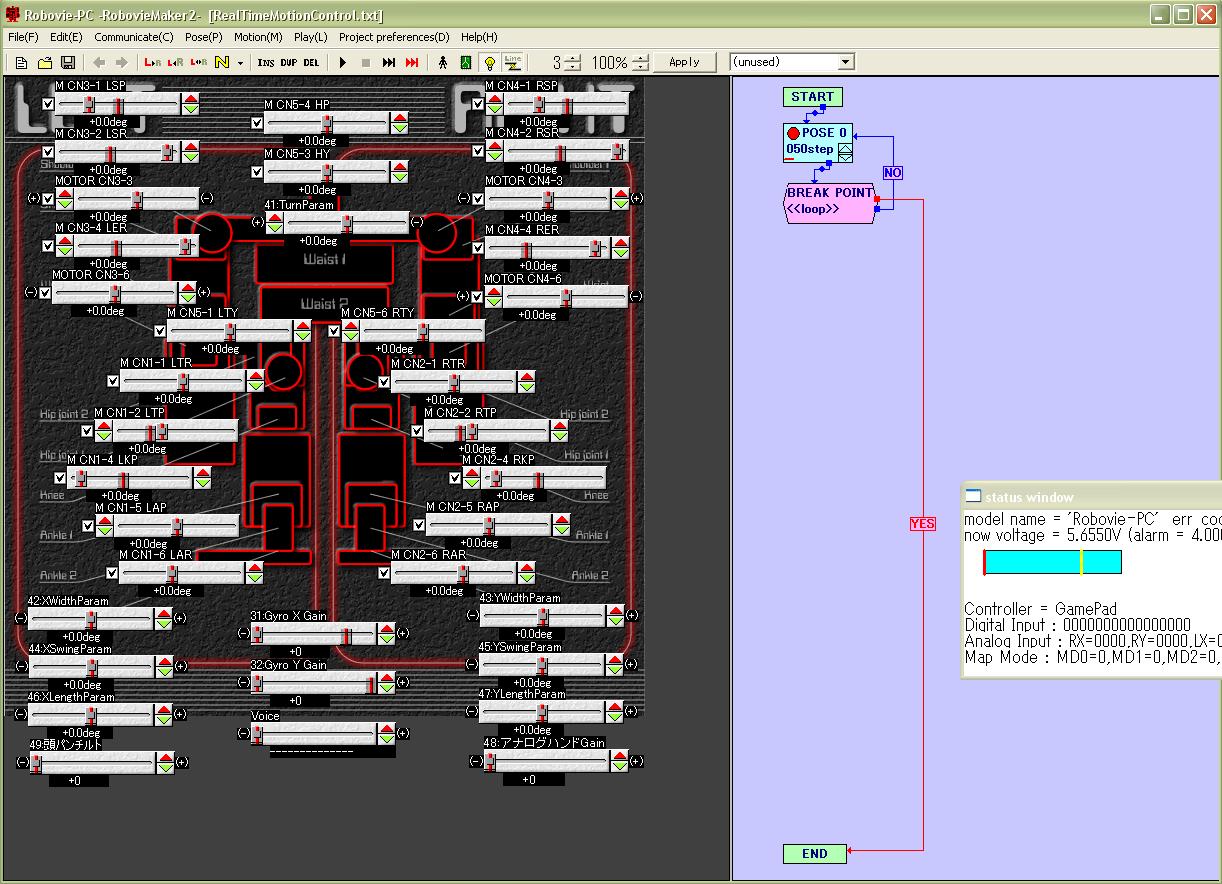
One reference pose with one loop block.
The slider bars are all zeros... except analog stick bar.
Do not forget setting analog slider bar to non zero. I'm using -20...
KTX-PC Pro Robot Project Ver6KTX-PC Robot Project Ver3
For KTX-PC, your current Robot Project should have analog slider bars...
Please use slider bar 49 for the analog control of head yaw joint.
Calculating Output value
In this example, I'm using variable number 246 to control the servo, which is already assigned to analog stick input of remote controller (already configured for real time motion control usage).
Here is the actual calculation applied to the servo output value.

The Servomotor output preference will be saved into CPU, not with the Robot Project file...
For KTX users, if you create a new robot project and mark on the check box says "initialize", it will automatically set those servo motor preferences so that it works with this sample code...
However, for KTX-PC, if your have changed the CPU preference and start having some problems, there is no easy way to fix...because you can not initialize the CPU board for KTX-PC right now... RM2 does not support it.Please give me couple more days to figure this out and will post the result here!!!
Please READ though the steps explained in this page and DO the steps in Quick Fix. It will reset the CPU preference so that it works with this sample code.Also, It covers the parameters for the gyros/accel sensor board. If you have not change your CPU preference yet, please try it now.
Calculation might looks complecated...., but it is really simple!!!
x = v26 + Gain1 * v53 / 256 * v246 / 256 + Gain2 * ..........
The "v26" represents variable number 26 which is the position value specified in the motion file currently playing.
The Gain is for you to pick... By changing the Gain, you can adjust servo response to your input without changing the motion files.
In other worse, if you change the gain, it will affect for all the motion files you would play.
Also, if you want to change its polarity, you will change that by changing the sign of your Gain.
The "v53" represents the value obtained from the slider bar value assigned for analog stick.
Therefore, you have to have non zero on the slider bar...., otherwise the calculation will give you v26 + ZERO.
v246 is the variable we are updating from our software.
Rest of the lines have Gain = 0, so they are not affecting.
If you want add more calculation using addtional sensors and etc..., you can change those lines.
Please read RM2 user manual section 5-3 for the use of servomotor output preference!!!
Wrap up
In this sample, I did not pay attention to the return value of SDK member functions. You can make it a little better application by taking care of those return value.
Also, I used analog CTRL bar to be activateion variable; however, you can use your own variable to do the same.
Especially for the use of multiple servo, you would need....
- 1 ~ #servo: a variable to hold the activation of real time control on the servo
- #servo: a variables to hold the position value of the servo.
If you wants to have 6 servos for the real time control, you will need 7 to 12 user defined variable to operate.
If your robot or VSRC003 does not response, please check if the RM2 has connection to the board or not.
You can only establish ONE connection with the board.
If that;s the case, disconnect your RM2, and press reset button on your VSRC003 and start your software.
Also, If your CPU board stop responding to your program, try establish connection from RM2 and disconnect. Then, try your program again. This likely happens after you kill the process without following shutdown process of CPU board.
No comments:
Post a Comment